Lab 2.1 – iWorkflow Authentication
iWorkflow supports the same authentication mechanisms as BIG-IP (HTTP BASIC, Token Based Auth). In this lab we will quickly review TBA on iWorkflow.
Task 1 – Token Based Authentication
In this task we will demonstrate TBA using the local authentication database, however, authentication to external providers is fully supported.
For more information about external authentication providers see the section titled “About external authentication providers with iControl REST” in the iControl REST API User Guide available at https://devcentral.f5.com
Perform the following steps to complete this task:
Click the ‘Step 1: Get Authentication Token’ item in the Lab 2.1 Postman Collection
Notice that we are sending a POST request to the
/mgmt/shared/authn/loginendpoint. Additionally, BASIC Authentication is required on the initial token request:
Click the ‘Body’ tab and examine the JSON that we will send to iWorkflow to provide credentials:
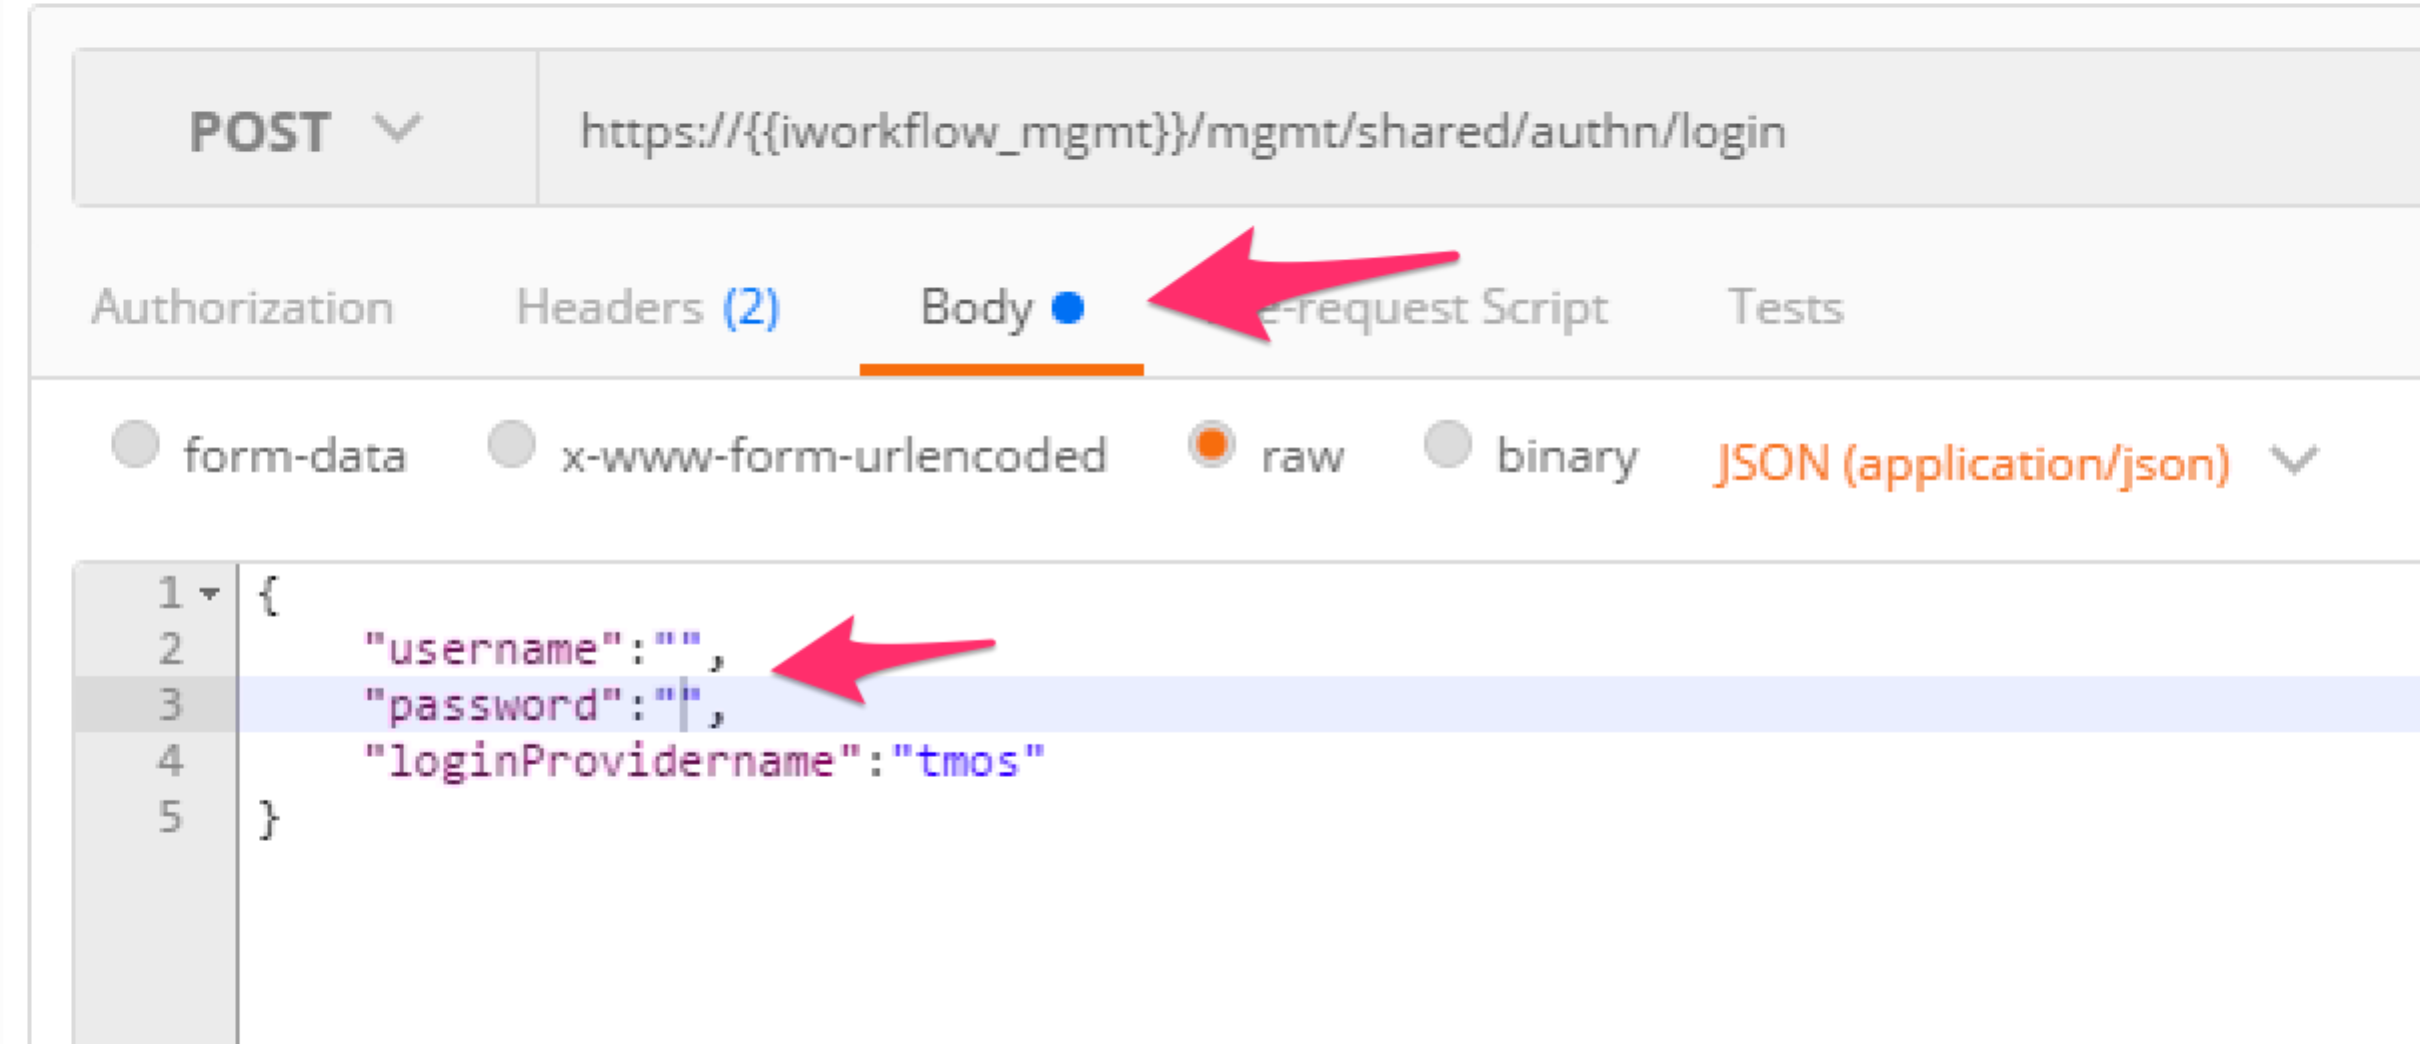
Modify the JSON body and add the required credentials (admin/admin). Then click the ‘Send’ button.
Examine the response status code. If authentication succeeded and a token was generated the response will have a 200 OK status code. If the status code is 401 then check your credentials:
Successful:
Unsuccessful:
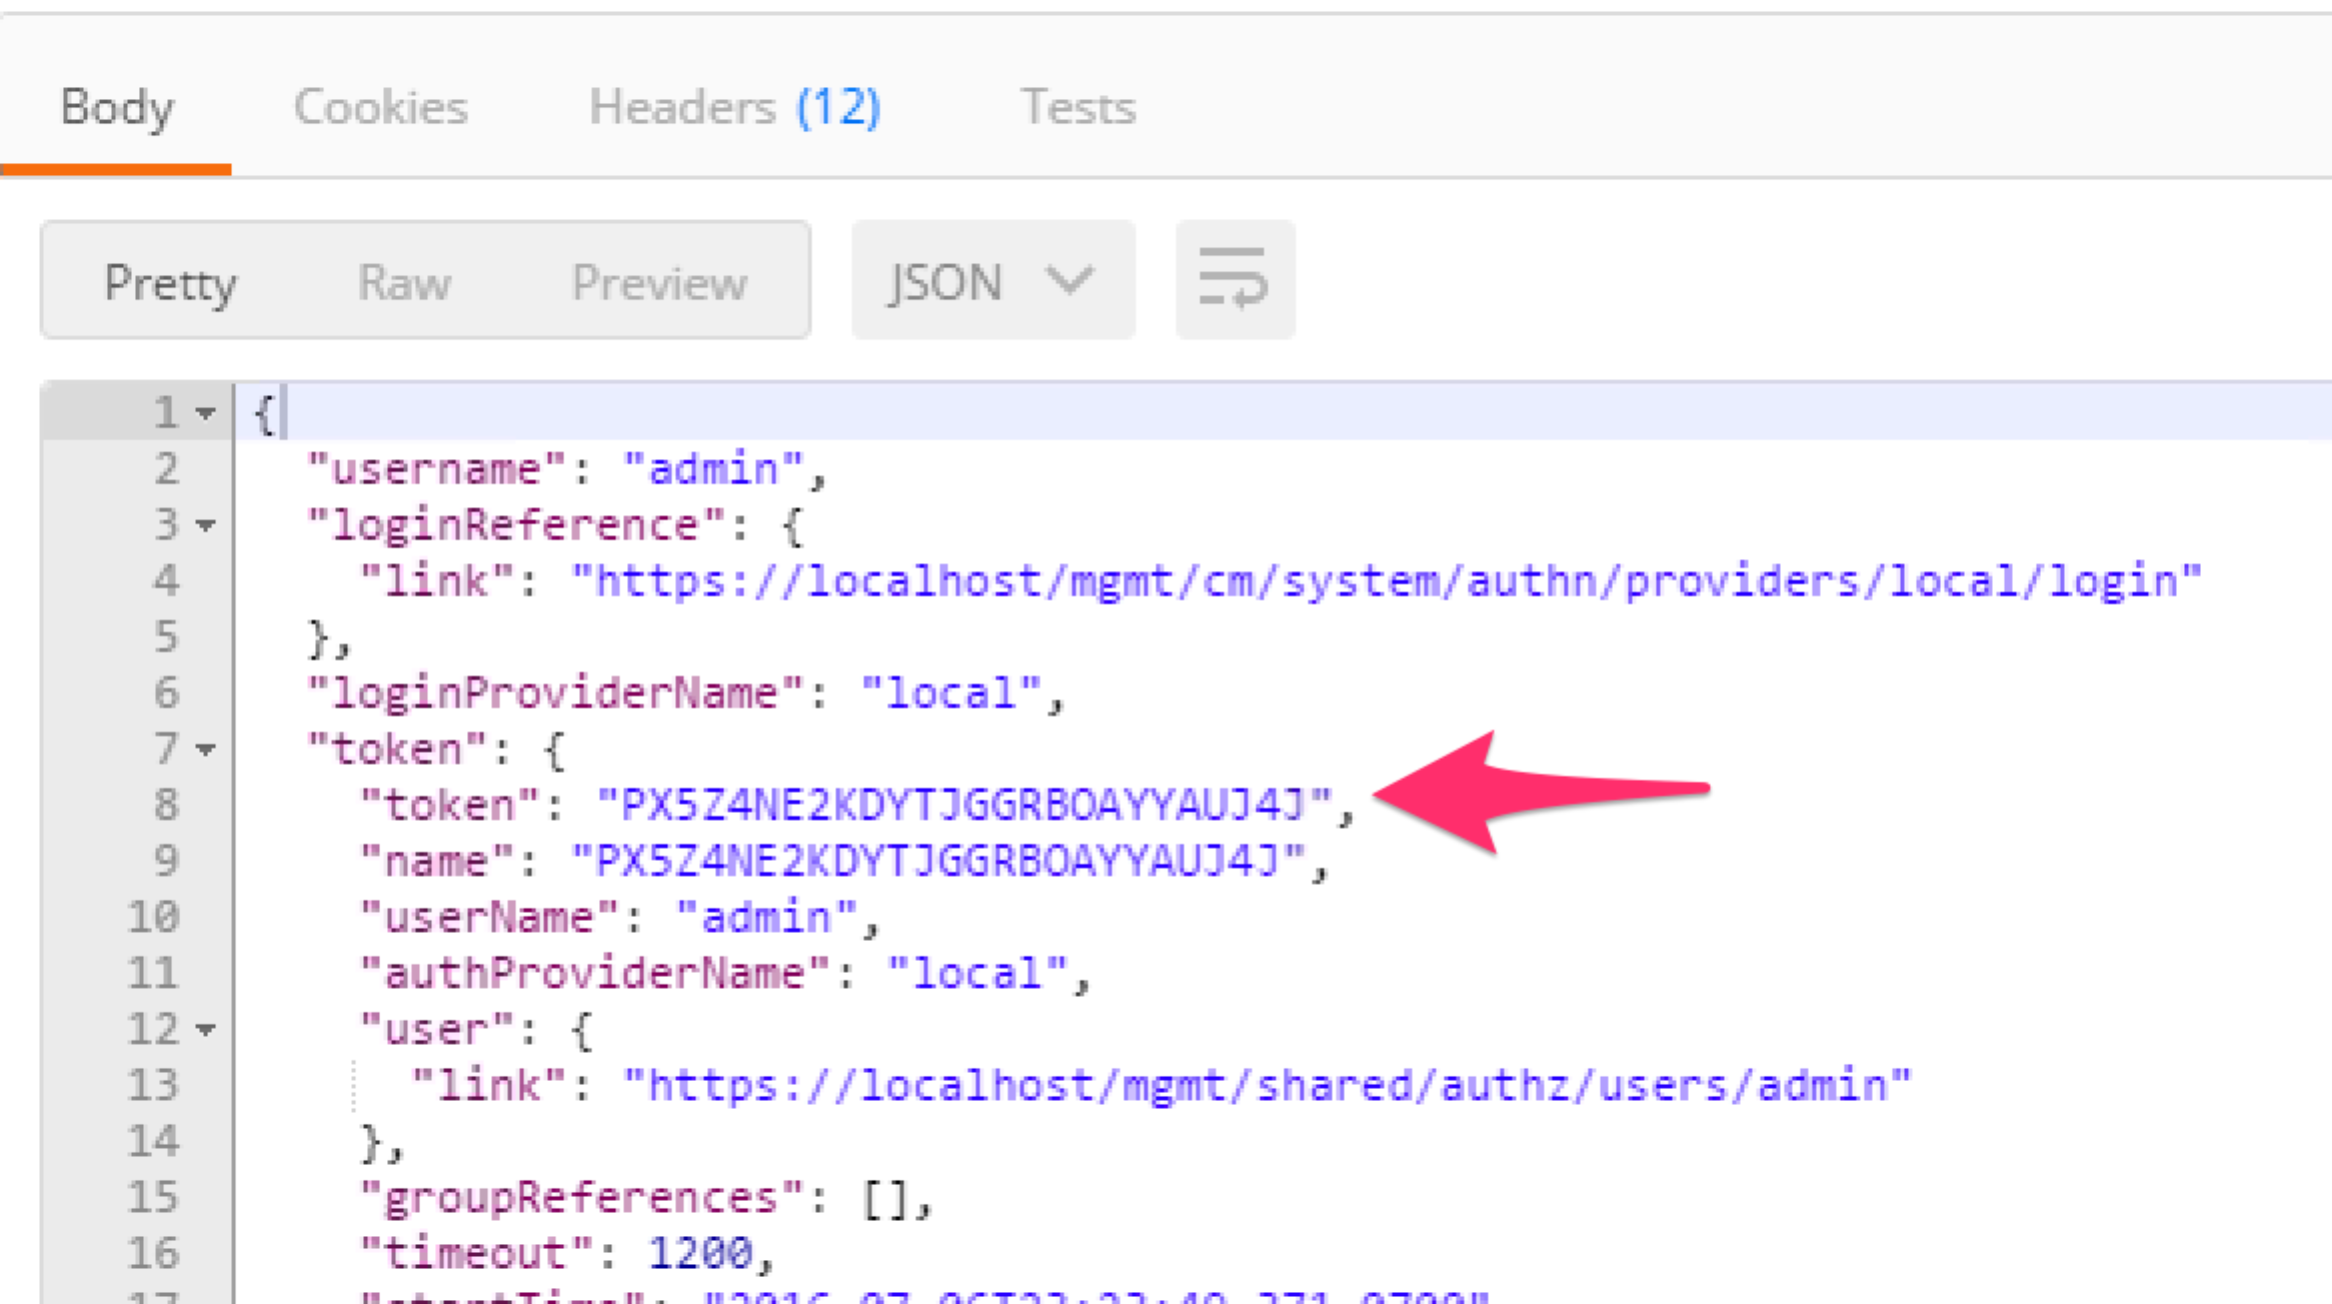
Once you receive a 200 OK status code examine the response body. The various attributes show the parameters assigned to the particular token. Find the ‘token’ attribute and copy it into your clipboard (Ctrl+c) for use in the next step:
Click the ‘Step 2: Verify Authentication Works’ item in the Lab 2.1 Postman collection. Click the ‘Headers’ tab and paste the token value copied above as the VALUE for the
X-F5-Auth-Tokenheader. This header is required to be sent on all requests when using token based authentication.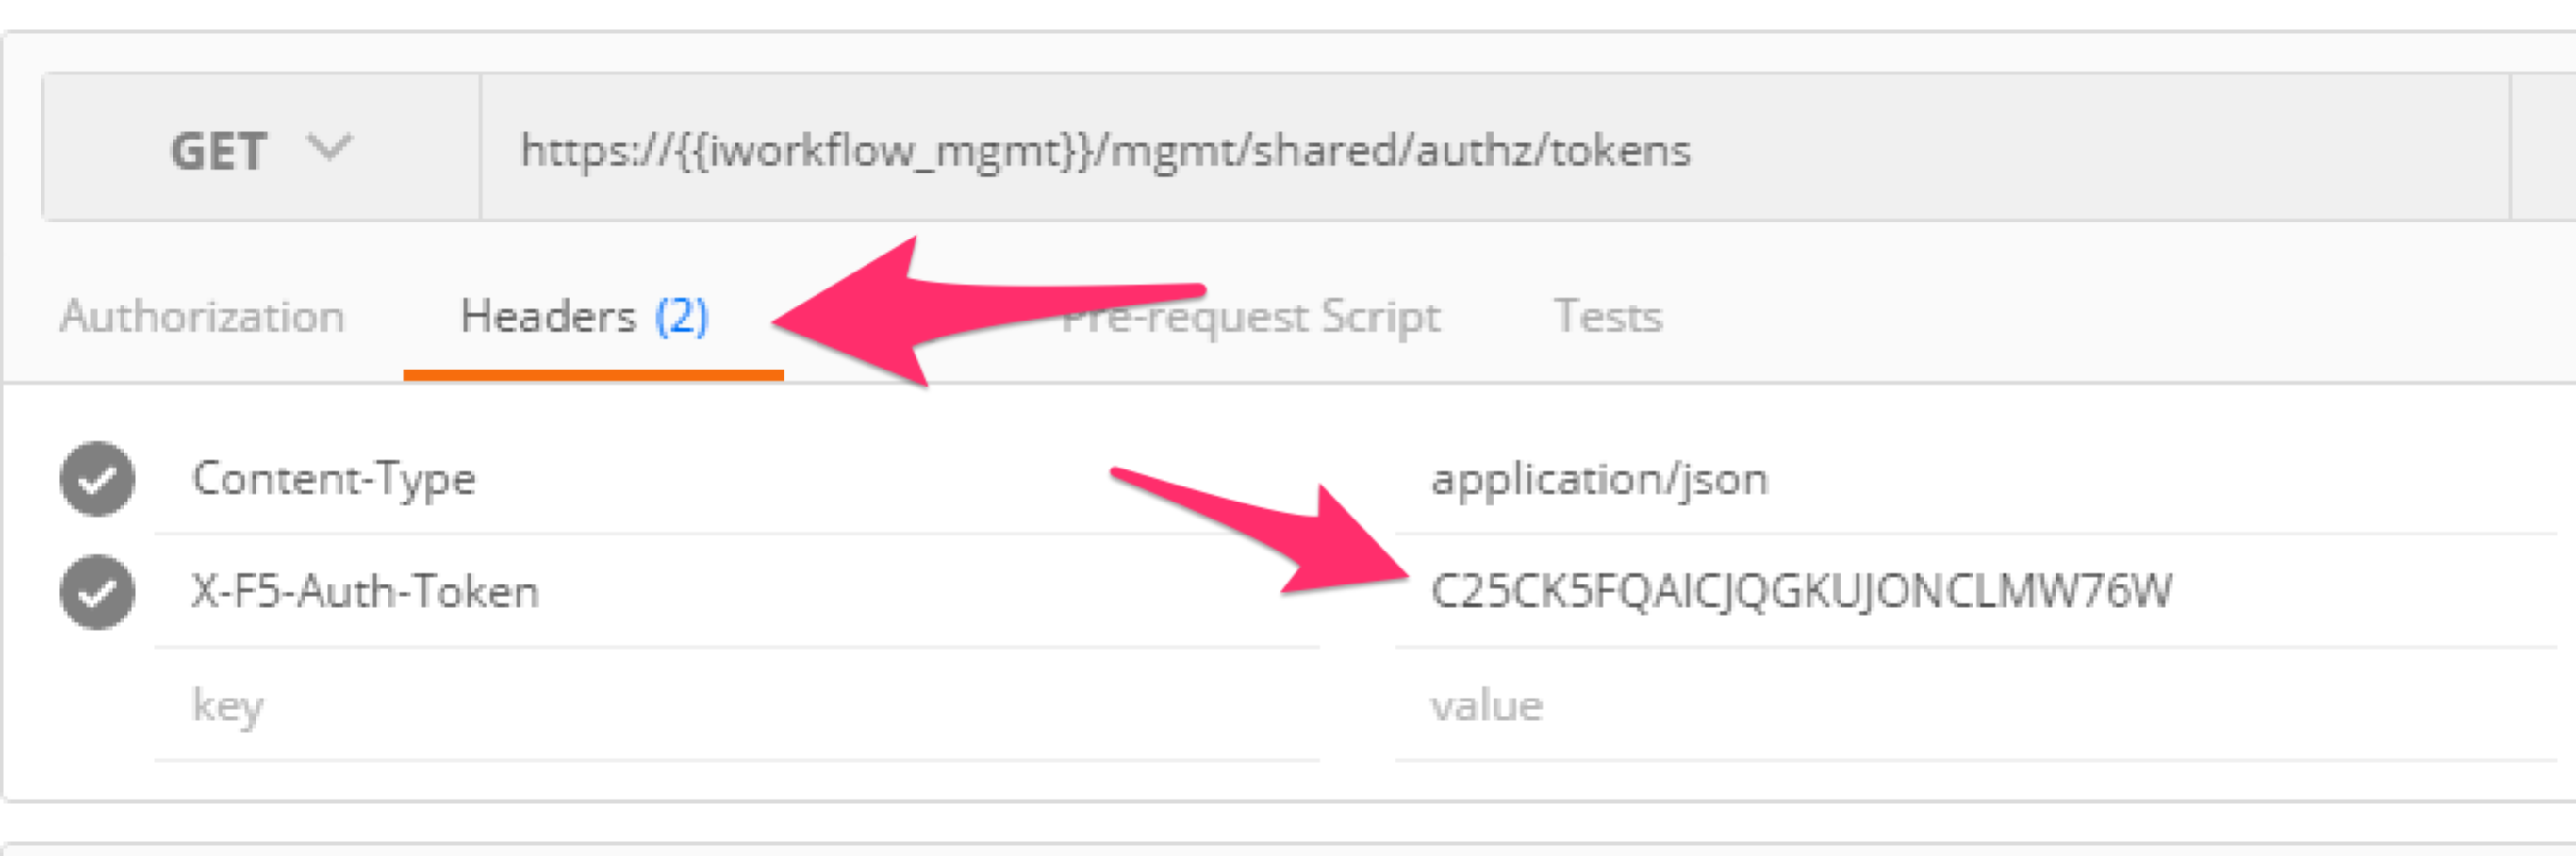
Click the ‘Send’ button. If you’re request is successful you should see a ‘200 OK’ status and a listing of the ‘ltm’ Organizing Collection.
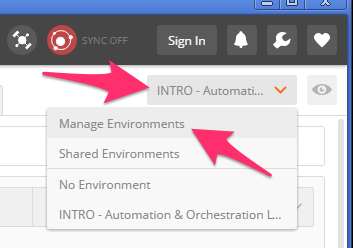
We will now update your Postman environment to use this auth token for the remainder of the lab. Click the Environment menu in the top right of the Postman window and click ‘Manage Environments’:
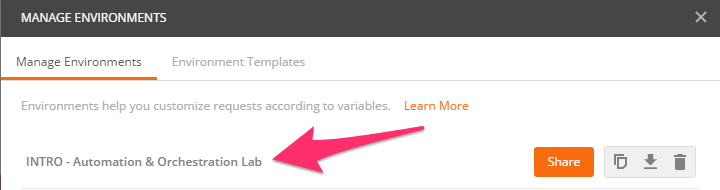
Click the ‘INTRO – Automation & Orchestration Lab’ item:
Update the value for ‘iworkflow_auth_token’ by Pasting (Ctrl-v) in your auth token:
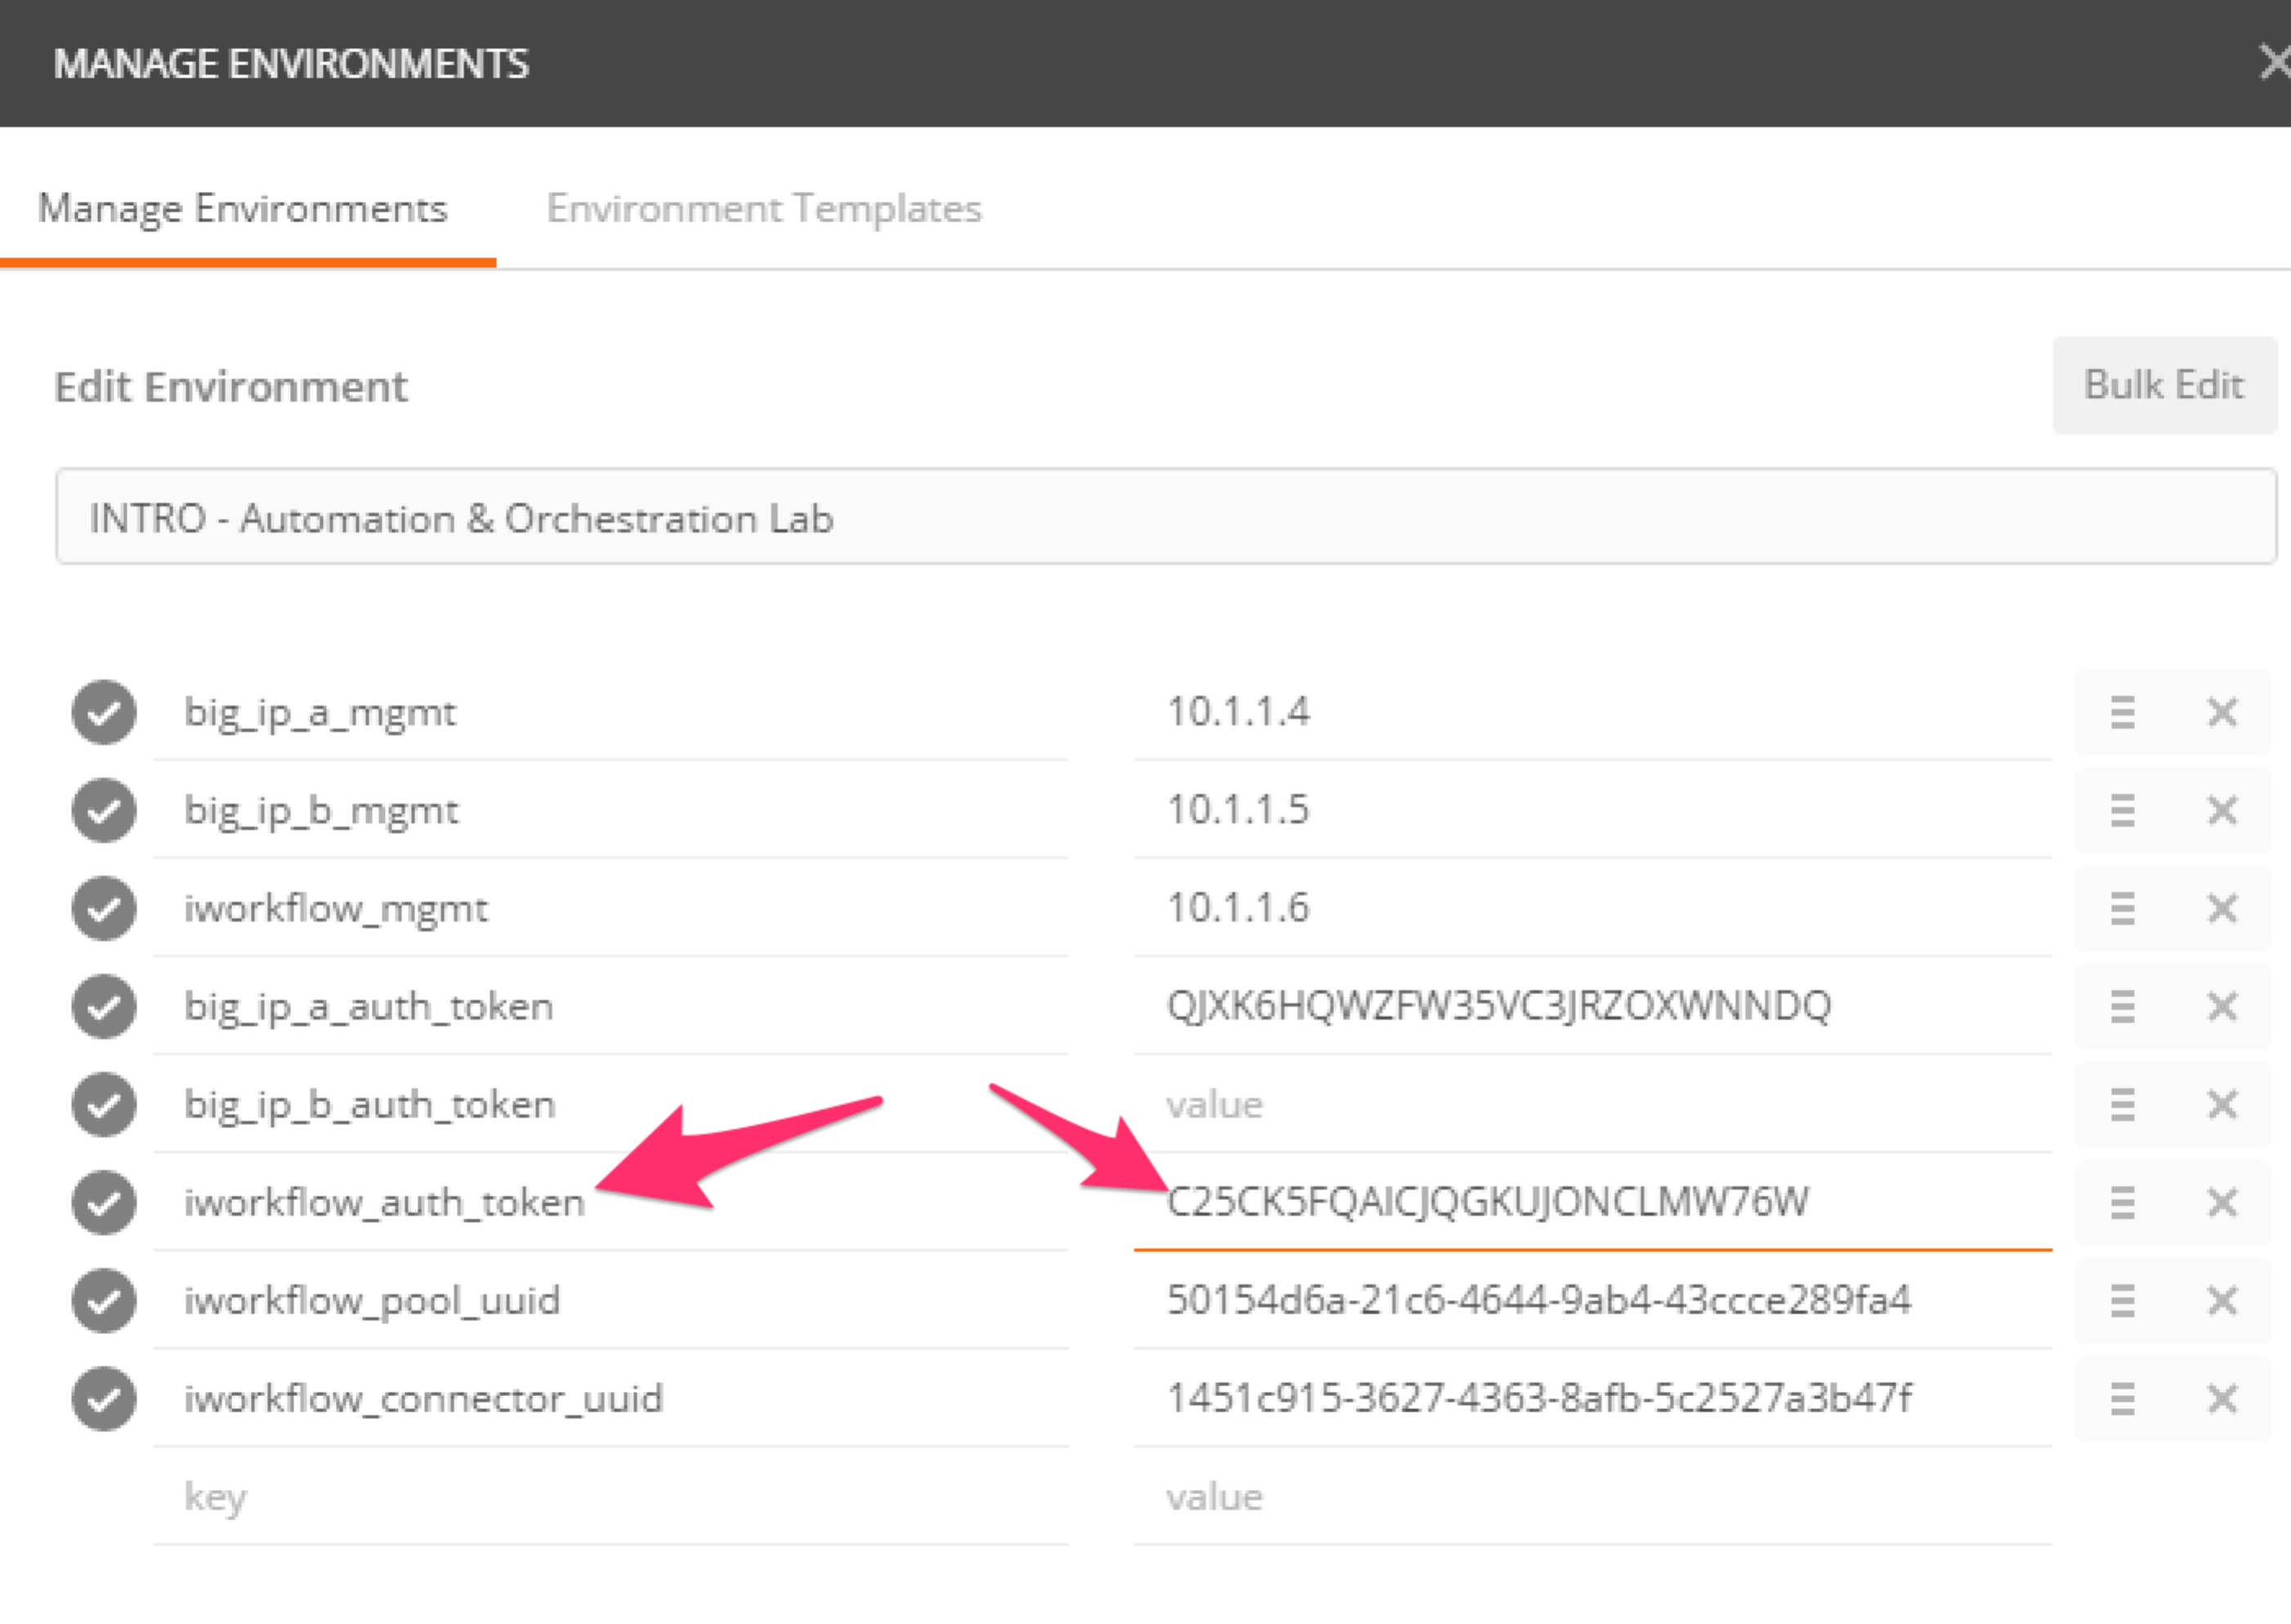
Click the ‘Update’ button and then close the ‘Manage Environments’ window. You’re subsequent requests will now automatically include the token.
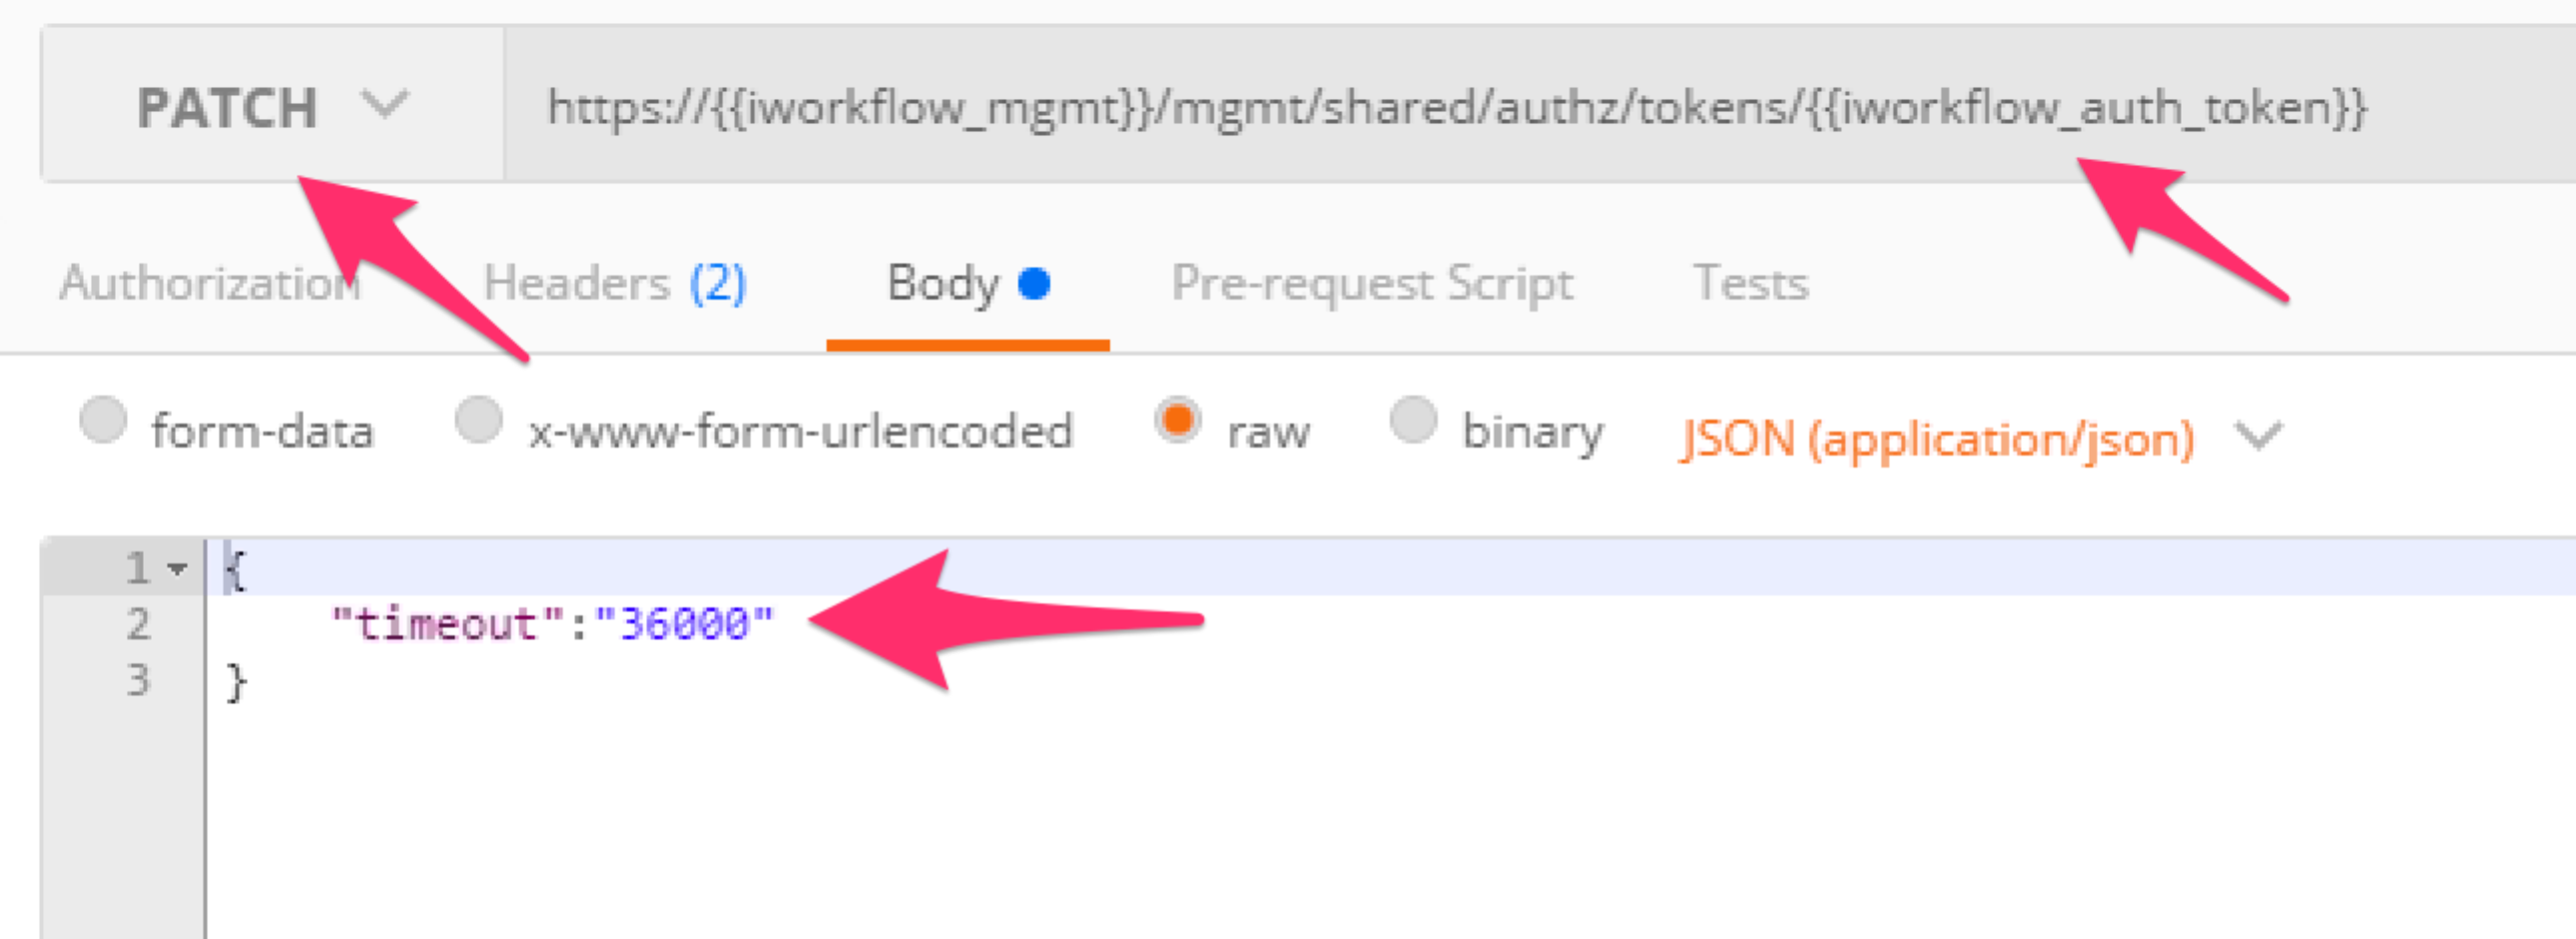
Click the ‘Step 3: Set Authentication Token Timeout’ item in the Lab 1.2 Postman collection. This request will PATCH your token Resource (check the URI) and update the timeout attribute so we can complete the lab easily. Examine the request type and JSON Body and then click the ‘Send’ button. Verify that the timeout has been changed to ‘36000’ in the response: