F5 Automation/Orchestration/Super NetOps/DevOps Training > F5 Automation & Orchestration - Introduction Index
Lab 2.3 – Create Tenant & BIG-IP Connector
iWorkflow implements a Tenant/Provider interface to enable abstracted deployment of L4-7 into various environment. In conjuction iWorkflow Connectors serve as the L1-3 Network and Device Onboarding automation component in the automation toolchain. iWorkflow supports Connectors for various vendor integrations (F5 vCMP, F5 BIG-IP, Cisco APIC, vmWare NSX, etc.) In this lab we will create a ‘BIG-IP Connector’ for the BIG-IP devices in the lab deployment. This connector will then allow you to drive a fully automated deployment from the iWorkflow Service Catalog.
Task 1 – Create a Tenant and Tenant User
In this task we will create a Local Connector that is linked to our BIG-IP devices. The Local Cloud Connector is DSC aware and will automatically detect that the BIG-IP devices are clustered and configure itself accordingly.
Perform the following steps to complete this task:
- Expand the “Lab 2.3 – Create Tenant &Local Connector” folder in the Postman collection.
- Click the “Step 1: Create iWorkflow Tenant” item in the collection and click
‘Send’. This request will create a tenant name
MyTenant. - Click the “Step 2: Create Tenant User” item in the collection and click ‘Send’. This request will create a tenant user.
- Click the “Step 3: Assign User to Tenant Admin Role” item in the collection
and click ‘Send’. This request will assign the Admin role for the
MyTenanttenant to thetenantuser.
Task 2 - Create a Local Connector
Click the “Step 4: Create a Local Connector” item in the collection. We will create a new connector by performing a POST to the local connector collection. If you examine the JSON body you can see we are providing a reference to the URL for the BIG-IP-A device (using the UUID environment variable we populated earlier):
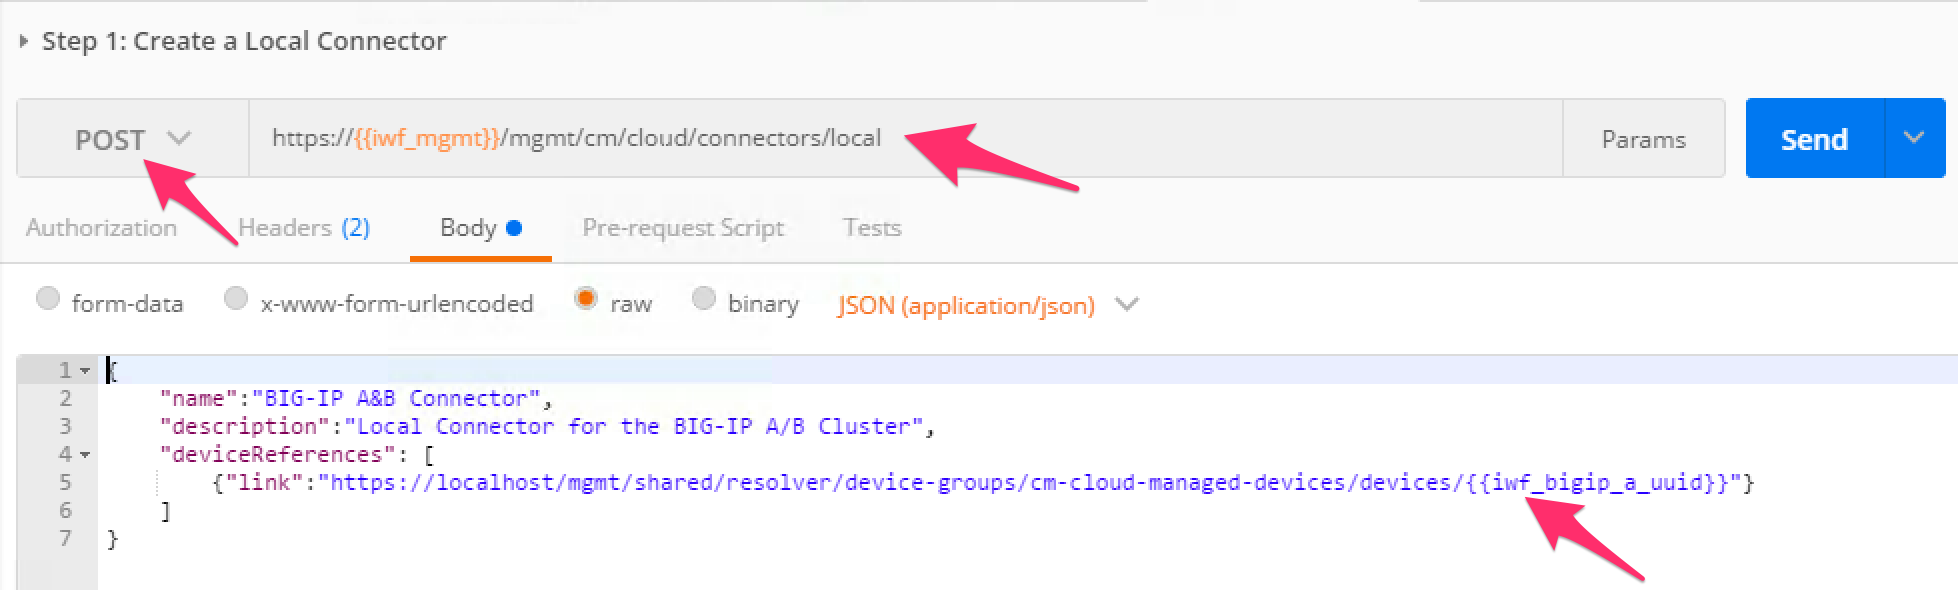
Click the ‘Send’ button to create the connector.
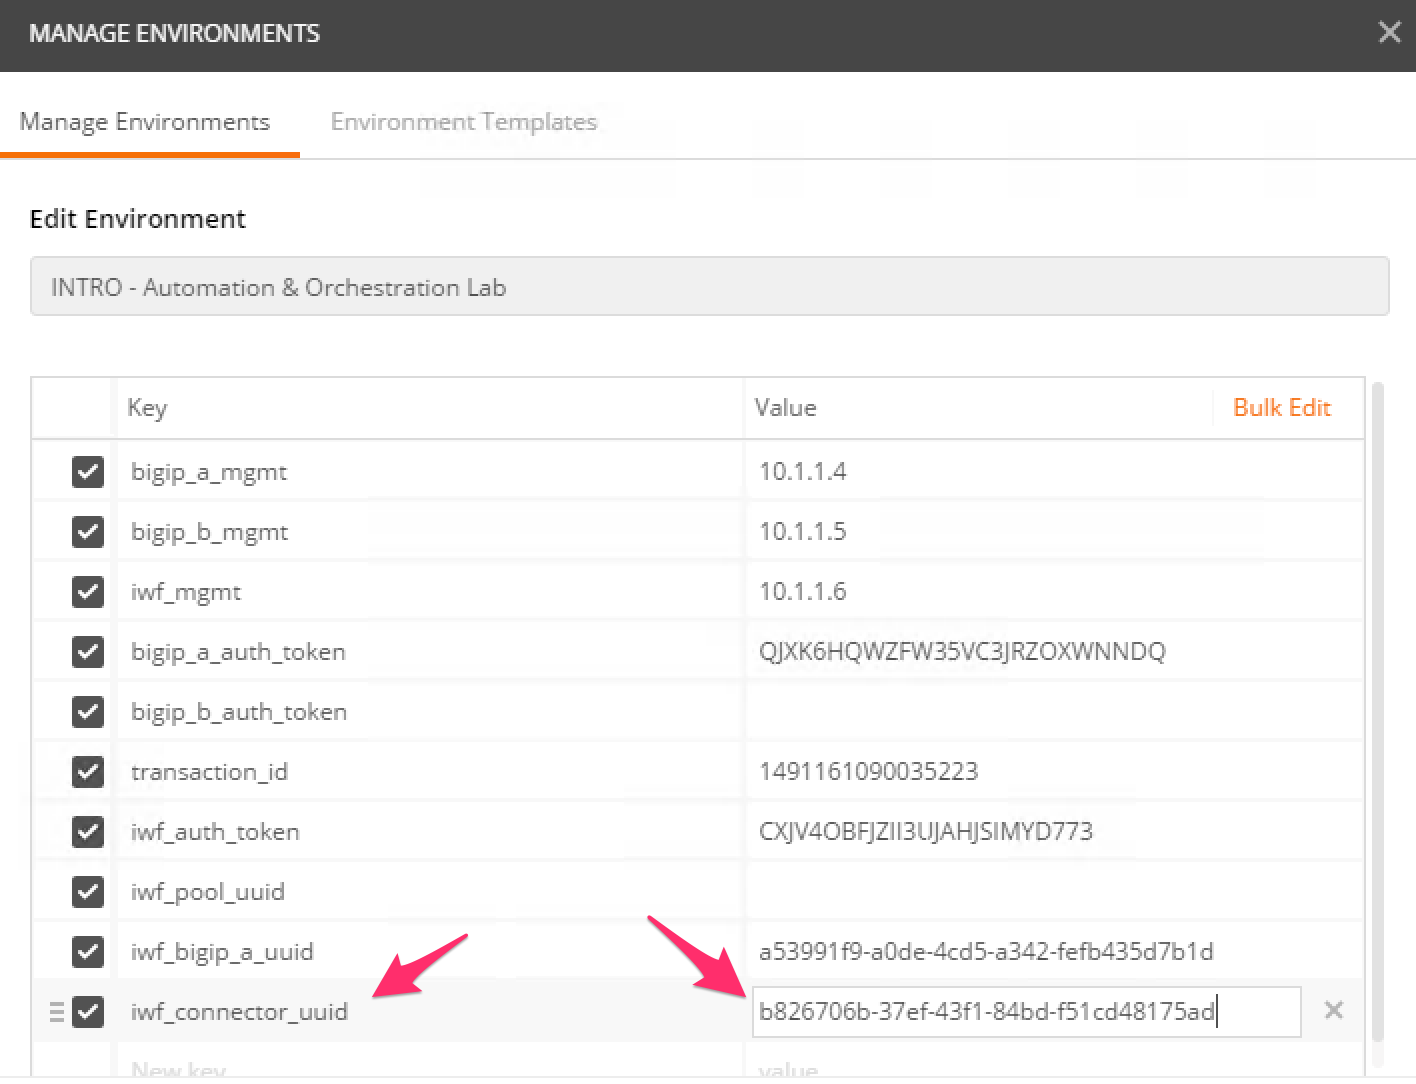
Click the “Step 5: Get Local Connectors” item in the collection and click ‘Send’. Examine the output to see how the connector was configured. Take note of the reference to the ‘device-group’. This is how the connector determines the HA state of the underlying BIG-IP devices. Find the ‘connectorId’ of the connector and update your Postman environment to include the ‘connectorId’ as the value of the ‘iwf_connector_uuid’ variable:

Click the “Step 6: Assign Connector to Tenant” item in the collection. The iWorkflow device has been pre-configured with a tenant named ‘MyTenant’. This request will assign this connector to to the ‘MyTenant’ tenant allowing service deployments from that tenant. Click the ‘Send’ button and examine the response.
| << Previous | Next >> |